
AI代理简介
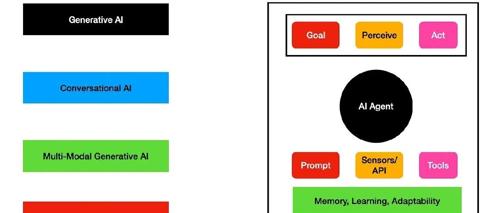
你可能听说过“生成式AI”这个术语——但什么是AI代理?本质上,它们是利用高级语言模型来更自主地处理任务的下一代工具。它们能够解析用户查询,挑选相关信息,并以结构化的方式与外部服务交互。
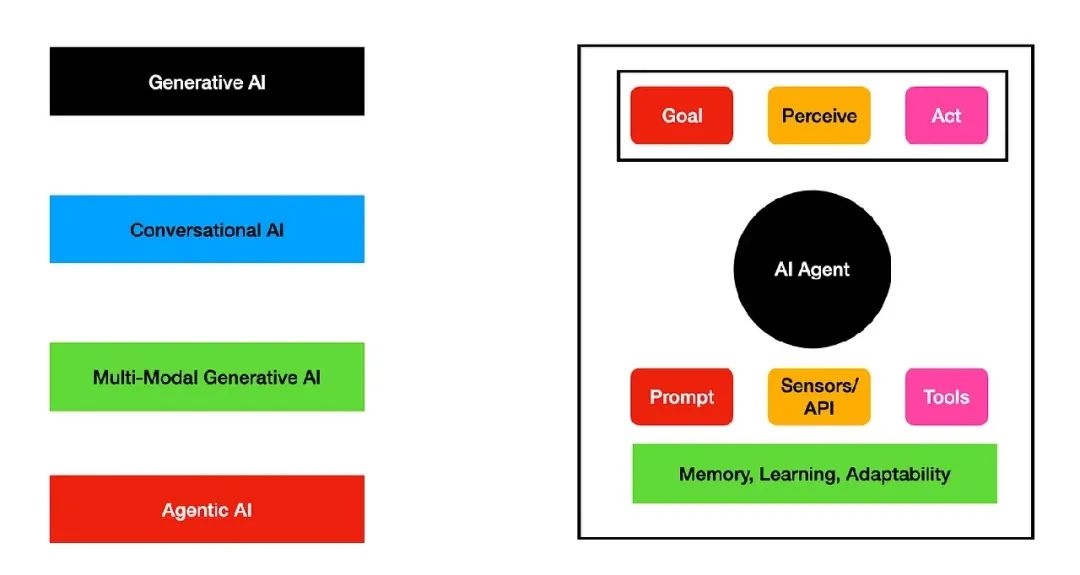
上图展示了AI如何从基本的生成模型发展到能够与各种工具协作的复杂AI代理。
PydanticAI简介
PydanticAI是一个Python代理框架,旨在简化利用生成式AI开发生产级应用的流程。由Pydantic背后的团队开发——Pydantic是许多Python库和框架中不可或缺的验证层——PydanticAI强调类型安全,并与mypy和pyright等静态类型检查器无缝集成。
详细内容可以阅读上一篇文章:全新代理构建器与框架 – PydanticAI
PydanticAI的关键特性包括:
•结构化响应:利用Pydantic验证和结构化模型输出,确保跨运行的一致性。•依赖注入系统:提供可选系统,为代理的系统提示、工具和结果验证器提供数据和服务,增强测试和迭代开发。•流式响应:支持LLM输出的持续流式传输,并进行即时验证,以获得快速且准确的结果。
目前PydanticAI处于早期测试阶段,其API可能会发生变化,开发团队欢迎反馈以优化和增强其功能。
环境设置
在安装pydantic-ai之前,请确认你的Python版本为3.9或更高:
python --version然后,创建并激活虚拟环境,接着安装pydantic-ai:
virtualenv skoloenvsource skoloenv/bin/activatepip install pydantic-ai
理解PydanticAI的核心
在PydanticAI中,核心工作组件是Agent类。通过它,你可以在多种模型上运行查询。你可以在官方文档中查看支持的模型完整列表。以下是一个使用OpenAI模型初始化Agent的简单代码片段:
from pydantic_ai importAgentfrom pydantic_ai.models.openai importOpenAIModel# 引用你所需的模型model =OpenAIModel('gpt-4o', api_key='add-your-api-key-here')agent =Agent(model)result = agent.run_sync("什么是比特币?")print(result.data)
我们建议将API密钥存储为环境变量:
export OPENAI_API_KEY='your-api-key'以下是PydanticAI支持的所有可用模型列表:
KnownModelName=Literal["openai:gpt-4o","openai:gpt-4o-mini","openai:gpt-4-turbo","openai:gpt-4","openai:o1-preview","openai:o1-mini","openai:o1","openai:gpt-3.5-turbo","groq:llama-3.3-70b-versatile","groq:llama-3.1-70b-versatile","groq:llama3-groq-70b-8192-tool-use-preview","groq:llama3-groq-8b-8192-tool-use-preview","groq:llama-3.1-70b-specdec","groq:llama-3.1-8b-instant","groq:llama-3.2-1b-preview","groq:llama-3.2-3b-preview","groq:llama-3.2-11b-vision-preview","groq:llama-3.2-90b-vision-preview","groq:llama3-70b-8192","groq:llama3-8b-8192","groq:mixtral-8x7b-32768","groq:gemma2-9b-it","groq:gemma-7b-it","gemini-1.5-flash","gemini-1.5-pro","gemini-2.0-flash-exp","vertexai:gemini-1.5-flash","vertexai:gemini-1.5-pro","mistral:mistral-small-latest","mistral:mistral-large-latest","mistral:codestral-latest","mistral:mistral-moderation-latest","ollama:codellama","ollama:gemma","ollama:gemma2","ollama:llama3","ollama:llama3.1","ollama:llama3.2","ollama:llama3.2-vision","ollama:llama3.3","ollama:mistral","ollama:mistral-nemo","ollama:mixtral","ollama:phi3","ollama:qwq","ollama:qwen","ollama:qwen2","ollama:qwen2.5","ollama:starcoder2","claude-3-5-haiku-latest","claude-3-5-sonnet-latest","claude-3-opus-latest","test",]
使用外部工具扩展PydanticAI
我们将使用PostgreSQL数据库并构建一个数据库连接类,作为PydanticAI代理的依赖项,使代理能够执行数据库功能。
PostgreSQL设置
首先,你需要一个正常运行且干净的PostgreSQL数据库。在上文链接的视频中,我展示了如何在DigitalOcean上设置一个PostgreSQL数据库(注意:你可以使用任何PostgreSQL数据库)。
你可以使用以下DigitalOcean的推荐链接开始:https://m.do.co/c/7d9a2c75356d
一旦你有了数据库,获取连接字符串——你将在下一步中使用它。
然后安装以下内容:
pip install psycopg2pip install asyncpg
我们将创建几个Python函数来设置一个“notes”表并检查其是否存在:
import psycopg2DB_DSN ="database-connection-string"def create_notes_table():"""如果“notes”表不存在,则创建它,包含“id”、“title”和“text”字段。"""create_table_query ="""CREATE TABLE IF NOT EXISTS notes (id SERIAL PRIMARY KEY,title VARCHAR(200) UNIQUE NOT NULL,text TEXT NOT NULL);"""try:connection = psycopg2.connect(DB_DSN)cursor = connection.cursor()cursor.execute(create_table_query)connection.commit()print("成功创建或验证了‘notes’表。")except psycopg2.Erroras e:print(f"创建表时出错:{e}")finally:if connection:cursor.close()connection.close()def check_table_exists(table_name: str)->bool:"""检查指定表是否在数据库中存在。"""query ="""SELECT EXISTS (SELECT 1FROM information_schema.tablesWHERE table_schema ='public'AND table_name =%s);"""try:connection = psycopg2.connect(DB_DSN)cursor = connection.cursor()cursor.execute(query,(table_name,))exists = cursor.fetchone()[0]return existsexcept psycopg2.Erroras e:print(f"检查表时出错:{e}")returnFalsefinally:if connection:cursor.close()connection.close()
确保你可以运行check_table_exists("notes")函数并得到“True”响应。这表明你的数据库连接正常工作,并且“notes”表已成功创建。
接下来,我们将引入一个异步类来管理笔记操作,例如添加笔记、检索笔记和列出标题。这个类将由“Agent”使用。
import asyncpgfrom typing importOptional,ListclassDatabaseConn:def __init__(self):"""存储用于连接的DSN(数据源名称)。"""self.dsn = DB_DSNasync def _connect(self):"""打开与PostgreSQL的异步连接。"""return await asyncpg.connect(self.dsn)async def add_note(self, title: str, text: str)->bool:"""插入具有给定标题和文本的笔记。如果存在同名笔记,则不会覆盖。"""query ="""INSERT INTO notes (title, text)VALUES ($1, $2)ON CONFLICT (title) DO NOTHING;"""conn = await self._connect()try:result = await conn.execute(query, title, text)return result =="INSERT 0 1"finally:await conn.close()async def get_note_by_title(self, title: str)->Optional[dict]:"""检索与指定标题匹配的笔记。返回字典或None。"""query ="SELECT title, text FROM notes WHERE title = $1;"conn = await self._connect()try:record = await conn.fetchrow(query, title)if record:return{"title": record["title"],"text": record["text"]}returnNonefinally:await conn.close()async def list_all_titles(self)->List[str]:"""获取并返回所有笔记标题。"""query ="SELECT title FROM notes ORDER BY title;"conn = await self._connect()try:results = await conn.fetch(query)return[row["title"]for row in results]finally:await conn.close()
将笔记与PydanticAI集成
为了将这些组件整合在一起,我们将创建两个不同的代理:
•意图提取代理:判断用户是想创建、列出还是检索笔记。•动作处理代理:使用我们的数据库代码实际处理数据。
以下是main.py的示例结构:
from dataclasses import dataclassfrom pydantic importBaseModelfrom pydantic_ai importAgent,RunContextfrom typing importOptional,Listfrom database importDatabaseConnfrom pydantic_ai.models.openai importOpenAIModelOPENAI_API_KEY ="enter-your-openai-api-key-here"classNoteIntent:action: strtitle:Optional[str]=Nonetext:Optional[str]=NoneclassNoteDependencies:db:DatabaseConnclassNoteResponse(BaseModel):message: strnote:Optional[dict]=Nonetitles:Optional[List[str]]=None# 1. 用于解析用户意图的代理intent_model =OpenAIModel('gpt-4o-mini', api_key=OPENAI_API_KEY)intent_agent =Agent(intent_model,result_type=NoteIntent,system_prompt=("你是一个意图提取助手。理解用户想要做什么(例如创建、检索、列出),并提取相关数据,如标题和文本。""你的输出格式必须是JSON-like结构,包含键:action、title、text。"))# 2. 用于执行识别动作的代理action_model =OpenAIModel('gpt-4o-mini', api_key=OPENAI_API_KEY)action_agent =Agent(action_model,deps_type=NoteDependencies,result_type=NoteResponse,system_prompt=("根据识别的用户意图,在笔记存储上执行请求的操作。""操作可以包括:‘create’(添加笔记)、‘retrieve’(获取笔记)或‘list’(列出所有笔记)。"))# action_agent的工具async def create_note_tool(ctx:RunContext[NoteDependencies], title: str, text: str)->NoteResponse:db = ctx.deps.dbsuccess = await db.add_note(title, text)returnNoteResponse(message="CREATED:SUCCESS"if success else"CREATED:FAILED")async def retrieve_note_tool(ctx:RunContext[NoteDependencies], title: str)->NoteResponse:db = ctx.deps.dbnote = await db.get_note_by_title(title)returnNoteResponse(message="GET:SUCCESS", note=note)if note elseNoteResponse(message="GET:FAILED")async def list_notes_tool(ctx:RunContext[NoteDependencies])->NoteResponse:db = ctx.deps.dball_titles = await db.list_all_titles()returnNoteResponse(message="LIST:SUCCESS", titles=all_titles)async def handle_user_query(user_input: str, deps:NoteDependencies)->NoteResponse:# 确定用户意图intent = await intent_agent.run(user_input)print(intent.data)if intent.data.action =="create":query = f"创建名为‘{intent.data.title}’的笔记,文本为‘{intent.data.text}’。"response = await action_agent.run(query, deps=deps)return response.dataelif intent.data.action =="retrieve":query = f"检索标题为‘{intent.data.title}’的笔记。"response = await action_agent.run(query, deps=deps)return response.dataelif intent.data.action =="list":query ="列出所有笔记的标题。"response = await action_agent.run(query, deps=deps)return response.dataelse:returnNoteResponse(message="无法识别的操作。")async def ask(query: str):db_conn =DatabaseConn()note_deps =NoteDependencies(db=db_conn)return await handle_user_query(query, note_deps)
构建Streamlit前端
最后一步是通过一个简单的Web界面使所有功能可访问。安装Streamlit非常简单:
pip install streamlit然后创建一个app.py文件:
import asyncioimport streamlit as stfrom main import ask # 从main.py导入ask函数st.set_page_config(page_title="笔记管理器", layout="centered")st.title("我的笔记仪表板")st.write("在下方输入指令以创建、检索或列出笔记。")user_input = st.text_area("你想做什么?", placeholder="例如,‘创建一篇关于我周一会议的笔记。’")if st.button("提交"):ifnot user_input.strip():st.error("请输入内容。")else:with st.spinner("正在处理..."):try:response = asyncio.run(ask(user_input))if response.note isnotNone:st.success(response.message)st.subheader(f"笔记标题:{response.note.get('title', '')}")st.write(response.note.get('text','未找到内容。'))elif response.titles isnotNone:st.success(response.message)if response.titles:st.subheader("当前标题:")for t in response.titles:st.write(f"- {t}")else:st.info("尚无可用笔记。")else:st.info(response.message)exceptExceptionas e:st.error(f"错误:{e}")
然后可以通过以下命令启动:
streamlit run app.py总结
通过一点努力,我们构建了一个强大的笔记管理工具,使用了以下技术:
•PydanticAI:用于解析用户请求和结构化数据•PostgreSQL:用于存储笔记•Streamlit:提供一个流畅、交互式的Web界面
(文:PyTorch研习社)